
When should a closure be shortened?
Sometimes a repair with a replacement housing and sleeve is not possible without shortening the closure a little. For example, in the case of damaged, torn or frayed fabric, it will be preferable to shorten the closure in order to find clean and solid fabric to be able to properly install the new stops.
If one or more teeth are missing at the bottom of the closure, this can also cause a problem with the engagement of the teeth, especially if they are the very first teeth, because the correct closing of the entire slide depends on the correct engagement of the start.
We will therefore consider shortening a closure if:
- the fabric is too damaged, torn,
- one or more teeth are missing at the stop,
- the base of the closure is not solid
- if you want to transform a double closure into a simple one and therefore have only one opening from the top< /span>
Attention: shortening a closure is possible if the teeth of your closure are made of plastic or metal. It will not be possible to shorten in case of nylon or for an invisible closure!
What tools are needed to shorten a closure?
No need for a sewing machine or too much material to correctly shorten a closure.
You will especially need delicacy because you will be working with small parts and the fabric for the closure must be cut cleanly.
Here is the equipment we recommend having:
- cutting pliers,
- flat pliers or jewelry pliers,
- a lighter,
- a pair of scissors,
- a replacement housing and sleeve
The different steps to shorten a closure
First place your item on a flat surface, on a table at a good height for example.
-
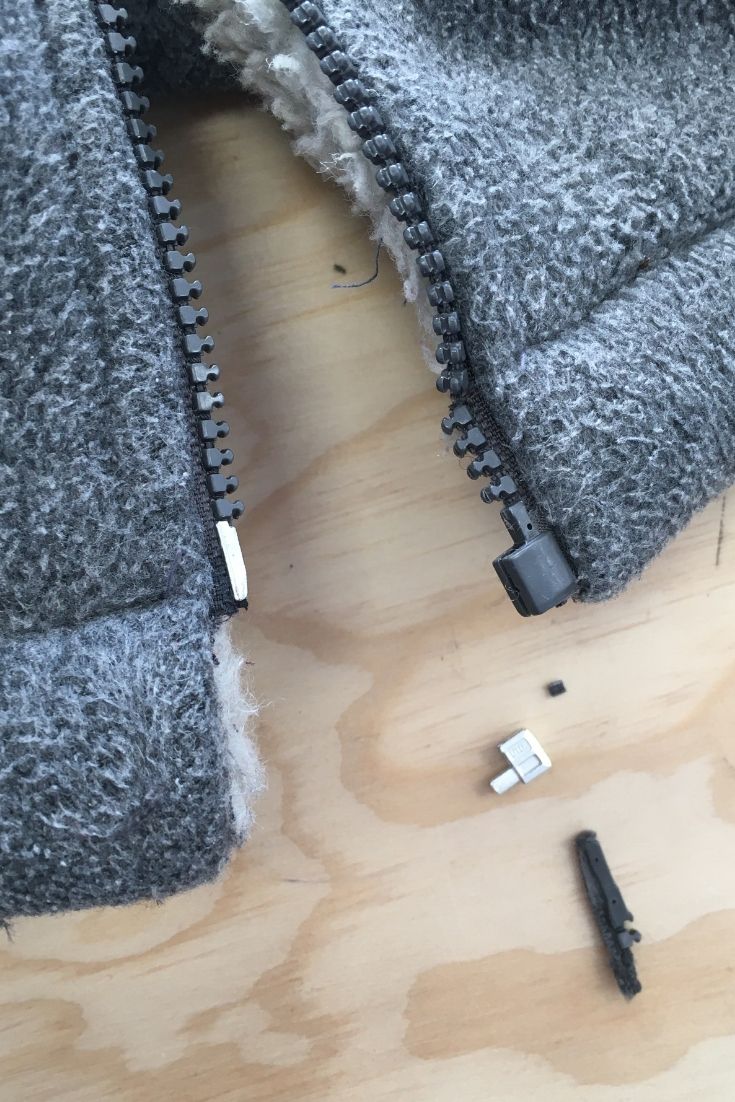
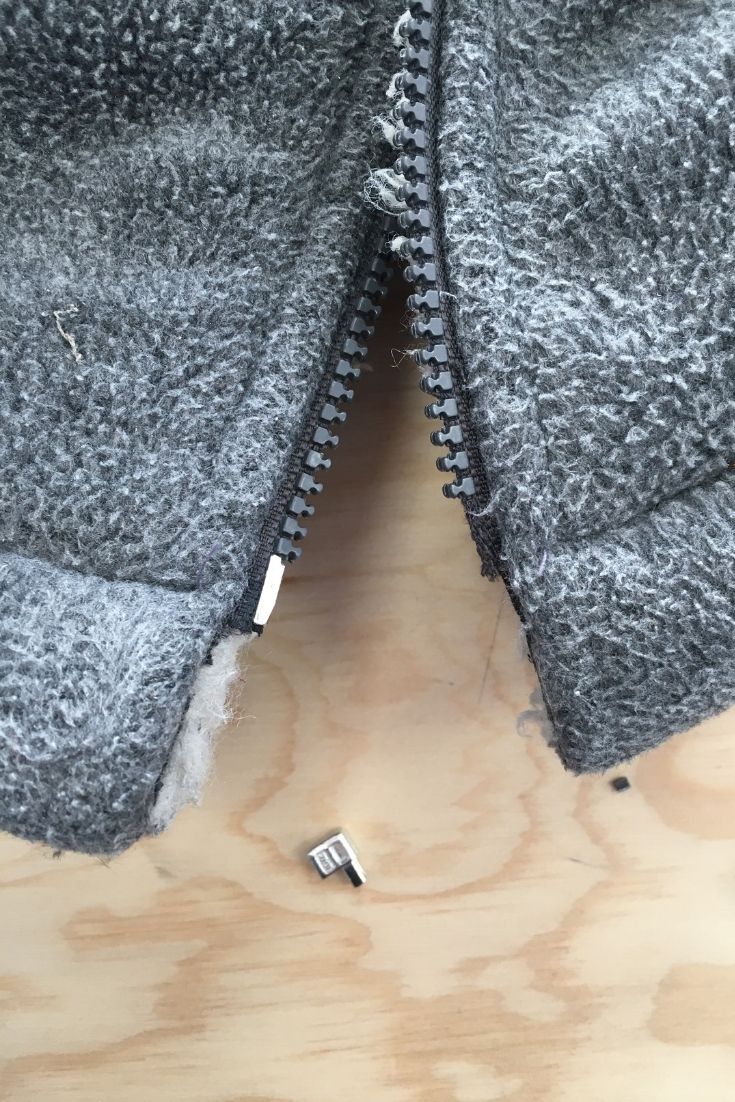
Start by cutting the fabric so as to balance each side of the closure: if you cut 1cm on the right you will have to do the same on the left. You can use cutting pliers or a pair of good scissors to get a clean and neat result. The fabric should not fray. Pay attention to the cursor: it must be at the top and not at the bottom of the closure during all the steps otherwise it could come out of the closure.
-
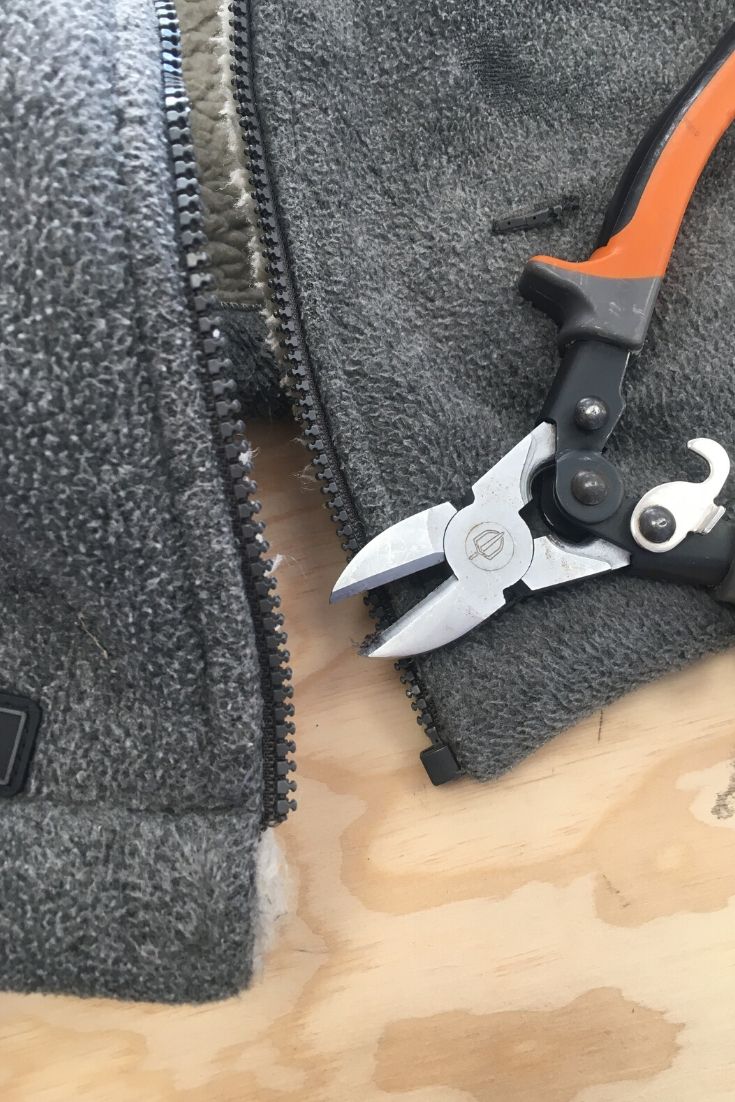
Then remove some teeth to have room to install the replacement housing and sleeve, two or three teeth are normally enough. We use cutting pliers to pop the teeth of the zipper one by one.
-
Once the teeth have been removed, take the lighter and heat the end of the closure fabric very quickly and lightly so that you have a stable base and not frayed.
-
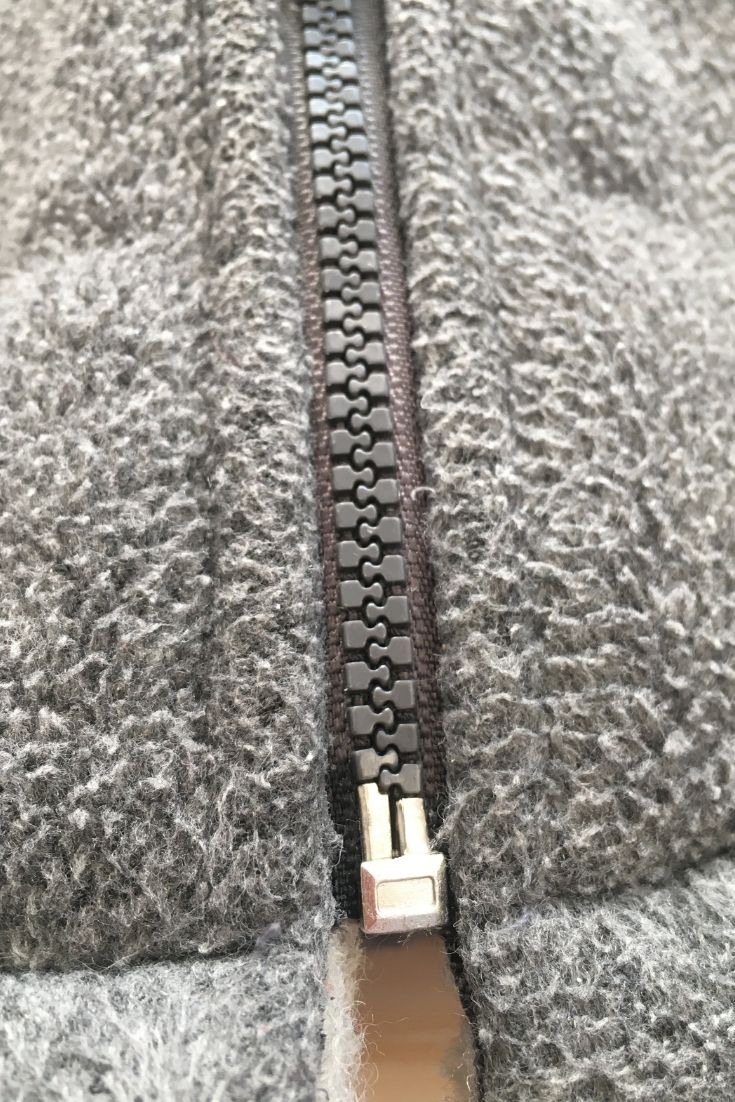
Then take the replacement housing (L part) and install it on the side where you have your cursor. This is the part that will block him when he is at the bottom. Using jewelry pliers or flat pliers, crimp the casing so that it grips the fabric. You can also add a small drop of glue to the slot in the case to make it even stronger but be careful not to overdo it.
-
All that remains is to install the sleeve, do the same as for the case. Be careful though because it is a piece that could easily deform or break if it receives too much pressure at once.
.JPG) |
 |
 |
.JPG) |
 |
 |
Thanks to this tutorial you have managed to shorten your broken or damaged zipper yourself. If possible you can test this tutorial on a jacket that you no longer use, to practice and to better understand each step.
If you have any needs or questions about a product or its use, do not hesitate to send us a photo of your closure by email to contact@clip-zip.ca
Have a good repair!